Showing posts with label craft. Show all posts

Thursday, December 19, 2013

Jingle Bells...lyrics, music, a game and some crafts

JINGLE BELLS

 The song that we now know as Jingle Bells was originally titled "One Horse Open Sleigh". It was written in 1857 by James Lord Pierpont. 
The chorus and the first verse are the most sung and best known part of the song.

Dashing through the snow
In a one horse open sleigh
O'er the fields we go
Laughing all the way
Bells on bob tails ring
Making spirits bright
What fun it is to laugh and sing
A sleighing song tonight

Oh, jingle bells, jingle bells
Jingle all the way
Oh, what fun it is to ride
In a one horse open sleigh
Jingle bells, jingle bells
Jingle all the way
Oh, what fun it is to ride
In a one horse open sleigh


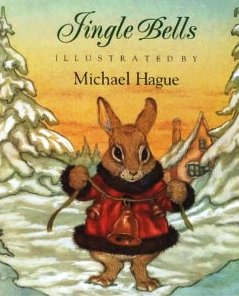
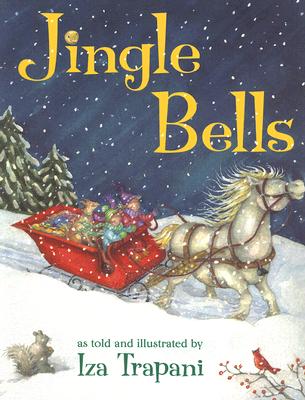
The song has also inspired many illustrators. You can find an illustrated version of Jingle Bells that calls to you and your child. 


 Related Activites:

Make Jingle Bells.....


These simple bells made of egg cartons, pipe cleaners and jingle bells were found at Fantastic Fun and Learning.com check here for full directions


 For a fancy wearable Jingle Bell Bracelet, use almost the same materials minus the egg carton and add a few fancy pipe cleaners. Spoonful .com has directions for three versions including the one below:


Play Bell Horses a fun musical game (Click here to see earlier post)


 Here are a couple of versions of Jingle Bells. The first version is very simple for kids to learn.


The kids will enjoy color this music sheet:
found at thegraphicsfairy.com

Monday, October 8, 2012

Who Stole the Bird's Nest?, a poem by Lydia Maria Child


Lydia Maria Child, who is best known for her poem, Over the River and Through the Woods, the famous Thanksgiving poem, also wrote many other poems and was an abolitionist, a women's right activist, and Indian rights activist as well as a novelist and journalist.


WHO STOLE THE BIRD'S NEST?

LYDIA MARIA CHILD
"To-whit! to-whit! to-whee!
Will you listen to me?
Who stole four eggs I laid,
And the nice nest I made?"

"Not I," said the cow, "Moo-oo!
Such a thing I'd never do.
I gave you a wisp of hay,
But didn't take your nest away.
Not I," said the cow, "Moo-oo!
[376]Such a thing I'd never do."

"To-whit! to-whit! to-whee!
Will you listen to me?
Who stole four eggs I laid,
And the nice nest I made?"

"Bob-o'-link! Bob-o'-link!
Now what do you think?
Who stole a nest away
From the plum-tree, to-day?"

"Not I," said the dog, "Bow-wow!
I wouldn't be so mean, anyhow!
I gave the hairs the nest to make,
But the nest I did not take.
Not I," said the dog, "Bow-wow!
I'm not so mean, anyhow."

"To-whit! to-whit! to-whee!
Will you listen to me?
Who stole four eggs I laid,
And the nice nest I made?"

"Bob-o'-link! Bob-o'-link!
Now what do you think?
Who stole a nest away
From the plum-tree, to-day?"

"Coo-coo! Coo-coo! Coo-coo!
Let me speak a word, too!
Who stole that pretty nest
From little yellow-breast?"

"Not I," said the sheep; "oh, no!
I wouldn't treat a poor bird so.
I gave wool the nest to line,
But the nest was none of mine.
Baa! Baa!" said the sheep; "oh, no,
I wouldn't treat a poor bird so."

"To-whit! to-whit! to-whee!
Will you listen to me?
Who stole four eggs I laid,
And the nice nest I made?"

"Bob-o'-link! Bob-o'-link!
Now what do you think?
Who stole a nest away
From the plum-tree, to-day?"

"Coo-coo! Coo-coo! Coo-coo!
Let me speak a word, too!
Who stole that pretty nest
From little yellow-breast?"

"Caw! Caw!" cried the crow;
"I should like to know
What thief took away
A bird's nest to-day?"

"Cluck! Cluck!" said the hen;
"Don't ask me again,
Why, I haven't a chick
Would do such a trick.
We all gave her a feather,
And she wove them together.
I'd scorn to intrude
On her and her brood.
Cluck! Cluck!" said the hen,
"Don't ask me again."

"Chirr-a-whirr! Chirr-a-whirr!
All the birds make a stir!
Let us find out his name,
And all cry 'For shame!'"

"I would not rob a bird,"
Said little Mary Green;
"I think I never heard
Of anything so mean."

"It is very cruel, too,"
Said little Alice Neal;
"I wonder if he knew
How sad the bird would feel?"

A little boy hung down his head,
And went and hid behind the bed,
For he stole that pretty nest
From poor little yellow-breast;
And he felt so full of shame,
He didn't like to tell his name.


Related  Activities:

 Look at a Birds Nest is a PDF with a whole slew of Bird's Nest activities

My Backyard has some great Bird Watching activities for kids
 
Education dot com has directions for going outside and making a "real" birds nest

Here's a recipe called Bird's Nest which is basically a fried egg in a toast "nest"


 Make a Spaghetti Birds Nest (Non-edible)
 found at http://www.busybeekidscrafts.com/Spaghetti-Nest.html

Here's what you'll need...
• Spaghetti, cooked and cool
• Paint
• Glue
• 2 Bowls
• Spoon
• Wax paper
• Paper plates (optional)


Here's how you make it...
1. Line your bowl with wax paper. Make sure your bowl will mold a big enough nest for what you want to put in it!


2. Mix 1 Tablespoon of Glue with 1 Tablespoon of paint in a bowl. Add 1 Cup of cooked, cooled spaghetti and stir until the spaghetti is covered (if you want to use more or less spaghetti just remember, one part glue, one part paint). If you are using more than one color just place one color on a paper plate or wax paper and clean out your bowl and mix another color.


3. Line your bowl with spaghetti, one or two pieces at a time. Try to arrange the spaghetti up the sides of the bowl, so that your eggs will sit in it.

4. Put your nest up on a shelf to dry. The amount of time your nest will take to dry and harden depends on the size of your nest. At the very least it will take a day, for larger nests it will take 2 or more. You can speed up the drying process by taking off the wax paper once the 'top' of the nest has dried, so that the bottom can get some air and harden.


Saturday, May 28, 2011

The Little Yellow Tulip.....story and activities

THE LITTLE YELLOW TULIP

Once there was a little yellow Tulip, and she lived down in a little dark house under the ground. One day she was sitting there, all by herself, and it was very still. Suddenly, she heard a little tap, tap, tap, at the door.

"Who is that?" she said.

"It's the Rain, and I want to come in," said a soft, sad, little voice.

"No, you can't come in," the little Tulip said.

By and by she heard another little tap, tap, tap on the window-pane.

"Who is there?" she said.

The same soft little voice answered, "It's the Rain, and I want to come in!"

"No, you can't come in," said the little Tulip.

Then it was very still for a long time. At last, there came a little rustling, whispering sound, all round the window: rustle, whisper, whisper.

"Who is there?" said the little Tulip.

"It's the Sunshine," said a little, soft, cheery voice, "and I want to come in!"

"N—no," said the little Tulip, "you can't come in." And she sat still again.

Pretty soon she heard the sweet little rustling noise at the keyhole.

"Who is there?" she said.

"It's the Sunshine," said the cheery little voice, "and I want to come in, I want to come in!"

"No, no," said the little Tulip, "you cannot come in."

By and by, as she sat so still, she heard tap, tap, tap, and rustle, whisper, rustle, up and down the window-pane, and on the door and at the keyhole.

"Who is there?" she said.

"It's the Rain and the Sun, the Rain and the Sun," said two little voices, together, "and we want to come in! We want to come in! We want to come in!"

"Dear, dear!" said the little Tulip, "if there are two of you, I s'pose I shall have to let you in."

So she opened the door a little wee crack, and in they came. And one took one of her little hands, and the other took her other little hand, and they ran, ran, ran with her right up to the top of the ground. Then they said,—

"Poke your head through!"

So she poked her head through; and she was in the midst of a beautiful garden. It was early springtime, and few other flowers were to be seen; but she had the birds to sing to her and the sun to shine upon her pretty yellow head. She was so pleased, too, when the children exclaimed with pleasure that now they knew that the beautiful spring had come!

from Stories to Tell Children,Fifty-Four Stories With Some Suggestions For Telling by Sara Cone Bryant


Make a simple Tulip life-cycle book

Make Tulip. Stick Puppets...all you need are sticks_you can gather some from outside or use craft sticks; paper to make the flowers and leaves; glue; markers or crayons and pictures of tulips that the kids can use for inspiration

Act out the story...
Have .children play the parts of the Yellow Tulip, the Rain and the Sun. You could also stretch the play to include children admiring the flower as it blooms.

Tuesday, July 27, 2010

Walk on Stilts Day


July 27, 2010 is

Walk on Stilts Day.

 The perfect way to celebrate this holiday is to learn the history of stilts and to make your own recycled cans version of stilts.

You don't see a lot of stilt walkers. Usually they are found in parades and at circuses.
Stilt-walking is an ancient art that only requires a pair of stilts and lots of practice.
Stilt-walking is said to have originated in Landes, France. Shepherds took up stilt-walking, as early as the 1800's,  as a way to not only save time getting to their scattered flocks but also to navigate areas that were sometimes treacherous.

According to Wikipedia:
Stilts are poles, posts or pillars used to allow a person or structure to stand at a distance above the ground. Walking stilts are poles equipped with steps for the feet to stand on, or straps to attach them to the legs, for the purpose of walking while elevated above a normal height. In flood plains, and on beaches or unstable ground, buildings are often constructed on stilts to protect them from damage by water, waves or shifting soil or sand. Stilts have been used for many hundreds of years.

A few fun and amazing Stilt walking records
• Most people to simultaneously walk on stilts: 1908. Doug Hunt and the North Park Collegiate HS students organized a mass stilt walk of 625 people walking 100 metres (328 ft) on 12” peg stilts.

• Tallest stilts walked on: 56 feet 6 inches. Roy Maloy of Australia, while wearing an overhead safety wire, took five independent steps on 56 ft. 6 inch stilts weighing 50.6 lbs. each.

• Longest stilt walk: 24 hours, 76.17 miles (122.58 km). Zdenek Jiruše of Czechoslovakia covered a distance of 76.17 miles (122.58 km) on stilts within 24 hours on 12 June 1992 in Pelhřimov.

 Why try stilt or can walking?

Because walking on Stilts/Cans builds a child's:
  • Balance and Coordination Skills and
  • Their Sense of Achievement and Self-esteem
 You can try you hand at making wooden stilts:
 and
Stiltwalker.com has interesting information on stilts and stilt walking.  
But the  easiest way to start "stilt" walking is to make Tin Can Stilts.
 you'll need:
2 - one pound coffee cans or juice cans or even paint cans
String or rope or yarn plaited into a braid
A screwdriver or awl
Colorful electrical or duct tape, stickers (the foam one are fun)

Directions:
  1. Turn the cans upside down, so that the open end is touching the ground (if using paint cans ,put the lids on them and use the handles to tie the rope onto)
  2. Then, use a screwdriver or awl to make two holes in each can, one on each side. (An adult should do this step.)
  3. String a piece of rope through the holes, and tie off the ends inside the can.This is a "handle" for your child to hold onto. It should be approximately waist high) 
  4. Decorate the cans
  5. Walk on your stilts


Wednesday, July 14, 2010

The Pigeon Finds a Hot Dog! .....Tuesday Book Look

I chose this Tuesday's book because July is National Hot Dog Month and July 19th is National Hot Dog Day.
The Pigeon Finds a Hot Dog! was written and illustrated by Mo Willems.
 Pigeon, the star of Don't Let the Pigeon Drive the Bus and four other books, finds a yummy looking hot dog which he plans to eat all by himself. But a very cute, curious, annoying and tenacious duckling has other ideas.

While you may not know, author Mo Willems name, you very likely have seen his work. He was a writer and animator for Sesame Street, created two animated series for the Cartoon Network and was the head writer for their Codename: Kids Next Door series. Three of  his books have received Caldecott Honors and Mo Willems is the creator of the Knuffle Bunny Books.


Okay, I worked really hard trying to find interesting craft ideas for this book that were about more than just cooking hot dogs....I kinda succeeded , sorta, cooking is involved in these activities but they involve a lot of creativity, also.

Hot Dog People
To make Hot Dog people you'll need - hot dogs, plastic knives and a microwave
  1. give each child an uncooked hot dog and a knife 
  2. the kids then use the knife to make slices in the hotdog to resemble body parts (slices at the top for hair, a face, a slice on each side for arms and a slice in the middle of the bottom, to make two legs). 
  3. Then cook the hot dog in the microwave for about 25 - 30 seconds.  
  4. As the hot dog cooks, it should begin to look more like a person. 
Read or act out the story of the 3 Pigs and then make Pigs in a Blanket (recipe and story here)
Here's an easy recipe for a Hot Dog and Fries cake using a loaf cake, Twinkies and icing.

Make a Hot Dog Squid


Monday, July 5, 2010

Musical Monday.....Teddy Bear's Picnic Day

"If you go into the woods today, you're in for a big surprise!"

Okay, maybe not today but July 10th is Teddy Bear's Picnic Day, so beware of teddy bears on the 10th. Or why not celebrate the holiday with your own Teddy and a few friends.

According to Wikipedia:
"Teddy Bears' Picnic" is a song consisting of a melody composed by John Walter Bratton in 1907 and lyrics added by British songwriter Jimmy Kennedy in 1932. It remains popular as a children's song, having been recorded by numerous artists over the decades.
In case you don't know the song, here's a really cute version.


If you go down in the woods today
You're sure of a big surprise
If you go down to the woods today
You'd better go in disguise

For ev'ry bear that ever there was
Will gather there for certain, because
Today's the day the teddy bears have their picnic

Ev'ry teddy bear who's been good
Is sure of a treat today
There's lots of marvelous things to eat
And wonderful games to play

Beneath the trees
Where nobody sees
They'll hide and seek as long as they please
That's the way the teddy bears have their picnic

Picnic time for teddy bears
The little teddy bears are having a lovely time today
Watch then, catch them unawares
And see them picnic on their holiday

See them gaily gad about
They love to play and shout
They never have any cares

At six o' clock
Their mummies and daddies
Will take them home to bed
'Cause they're tired little teddy bears

Activities to Celebrate Teddy Bear's Picnic Day

Host a Teddy Bear's Picnic or Tea
Invite the children to bring their Teddy Bears or Significant Stuffed Other to a picnic or tea party
Menu Ideas:
  • Sandwiches:  Peanut Butter and Jelly Triangles (crusts off), Chicken Salad Finger Sandwiches, other Tea Sandwich ideas
  • a variety of Miniature Muffins
  • Animal Crackers
  • Gummi Bears
  • Slices of Pound and/or Angel cake that the children can decorate and eat with pieces of fresh fruit and fruit syrups
  • Drinks: Lemonade, Apple Juice, Herbal Sun Tea, Mint Tea Punch (the recipe is at the end of the blog)

Make Teddy Bear Puppets

Read about famous Teddy Bears: Winnie-the-Pooh, Paddington Bear, Corduroy Bear, the Carebears

Learn the History of the Teddy Bear

Mint Tea Punch
8 mint tea bags
2 quarts boiling water
1 cup sugar
2 ½ cups pineapple juice
1 can (6 ounces) frozen lemonade concentrate, thawed
2 large sprigs fresh mint
  1. In a large glass bowl, steep tea bags and boiling water for 4 minutes. 
  2. Remove tea bags. Discard. 
  3. Add sugar and stir until dissolved. Let cool. 
  4. Add pineapple juice, mint leaves and lemonade. 
  5. Serve over ice in a punch bowl.


Friday, July 2, 2010

Fabulous Fourth of July Crafts and Books

 The fourth of July is almost here.

Time to fire up the grill, grab some sparklers and , of course, make a few fun, fabulous and fast Fourth of July crafts!

Oh, and read a few books about the Fourth, also.( I've placed links to 9 interesting books about the Fourth of July ,appropriate for a variety of age levels, at the end of this blog.)

Let's get started on those crafts.....

Coffee Filter Fireworks - You need: Washable Markers, Coffee Filters, Spray Bottle (optional), Water - Flatten out the coffee filter; Spritz with water or sprinkle on water; only Dampen the filter DO NOT Soak it! ; Use the markers to draw on the damp filter; the water will cause the colors to spread and give a tie dye or fireworks effect


Sidewalk Water Balloon Firework Paint Splatters

Confetti Launcher

Patriotic Pom Poms

Fireworks Flowers


Make a Fireworks Tshirt - you'll need: a tshirt, glitter fabric paint, newspaper
To make your T-shirt - lay the shirt on a flat surface; place folded newspaper between the t-shirt layers to keep the paint from bleeding through; use the glitter paint to draw, free-hand, bursts of fireworks; follow manufacturers directions to dry and wash the t-shirt


Stars 'n' Stripes Hats

Bigger kids can actually Make Sparklers with adult assistance

Check out these books about the Fourth of July:

Friday, May 21, 2010

Click! ...a Friday Book Look for National Photography Month

May is National Photography or Photo Month. (yes, another holiday) Since the month is fast getting away from me, I'm putting up a ....Tada!...Friday Book Look! Click: A Book About Cameras and Taking Pictures was written by Gail Gibbons.

According to School Library Journal:
Gibbons takes a complex subject and breaks it down into simple, easy to understand terms. She describes different types of cameras and their film, and explains what happens to film inside the camera and at a photo-processing center. At this point, the author states, "First the film is removed from the cartridge in a darkroom, lit only by a red light. Then the latent images on the film are developed by soaking the film in chemicals." In fact, film must be removed in total darkness or it will be ruined; a red light will erase latent images. Explanations of printing, negatives and enlargements, tips on the care of a camera and on taking photos both indoors and outdoors are provided. A very basic chronology on the history of photography completes the presentation.
This book is a perfect lead up to making a Pinhole Camera.
Kids love to take pictures. There are many types of throwaway cameras available for children to experiment with. There are even cameras made especially for children. But a fun and educational way to learn about cameras and picture taking is to make a Pinhole Camera. A pinhole camera is a very simple camera with no lens that lets light in through a small pinhole which is what makes the picture. For the history and some of the science of Pinhole Cameras check with wikipedia.

A pinhole camera can be made with recycled materials that you have at home. If you really want to make a pinhole camera that will take a picture then you will need a few special materials:Resin-coated 5x7 inch black and white photographic paper, developing liquid and fixer. Because of the chemicals this is not a project that small children can do for themselves. For the special photography supplies check your local photography or hobby shop.

While a pinhole camera is basically a box with a tiny hole, there are many ways to make the camera. Here are a number of links showing different ways to assemble the camera.
Highlight Magazine's Pinhole Camera is very simple and best for young children.

Very interesting directions for making a Lego Pinhole Camera.

This site has very good directions and pictures for Making an Oatmeal Box Pinhole Camera and good directions for developing the film.

Science for kids explains how the human eye works like a pinhole camera.

This is a really well done video on How to Make a Pinhole Camera out of a Juice box.


Tuesday, May 18, 2010

The Bicycle Man...Tuesday Book Look

May is National Bike Month. So this Tuesday Book Look is about a classic bike book.
The Bicycle Man was written in 1989 by Allen Say.

The books official description says:
The amazing tricks two American soldiers perform on a borrowed bicycle are a fitting finale for the school sports day festivities in a small village in occupied Japan. 

The fact that the story takes place during World War II is important to the story. The book's author, Allen Say,  was born in Yokohama, Japan, in 1937.

The ideas below are simple and colorful ways to decorate a bicycle.
  • Take colored straws and make a small slit down one side with a sharp scissor. Put the straws on the wheel spokes.
  • Add streamers or colored string to the handlebars using colored duct tape or electrical tape or special handlebar grip tape.

  • Make a Bicycle License Plate
Materials
* Poster board in a variety of colors
*  A Paper punch
* Glitter glue, markers, stickers etc
Instructions:
  1. Cut the poster board into 6- by 11-inch rectangles
  2. Use a paper punch to make a hole near each top corner.
  3. The kids can now use the glue, stickers, markers and anything else they can think of to personalize their bicke plates. 
  4. a variation of the bike plate


Tuesday, April 20, 2010

Kindergarten Day!


April 21st is Kindergarten Day. Kindergarten day is celebrated on the birth day of Friedrich Froebel. In 1837, he started the first Kindergarten in Germany. Kindergartens were originally only a 1/2 day. It's aim was to acclimate children in a fun way to the learning environment and to promote social interaction.

There are so many fun activities in Kindergarten....the art, the singing, circle time (here's a list of Great Picture Books for Kindergarten Day).Of the many great art projects done in kindergarten working with clay is favorite with kids and adults.Making your own clay can also be exciting and art of all kinds stimulates both sides of the brain and stimulates creativity.

After making the clay and the pots below, you may want to take the kids to a local museum to look at pottery from other countries and other time periods.

BAKING CLAY
you'll need:

* 4 cups flour
* 1 cup salt
* 1 1/4 - 1 1/2 cup water
* Optional: food coloring

directions:

1. Mix together all of the above ingredients into a dough.
2. Knead dough until smooth.
3. Add food coloring if desired.
4. Your dough is now complete.

Once you've made something with the dough you need to bake the items at 300 degrees until set, approximately 1/2 hour to an hour.
You can seal the items with shellac when they have cooled down.


How to make a Pinch Pot

you'll need:

* The Baking Clay above or any self-hardening clay
* small amount of water

instructions:
(the clay may dry out while you work with it so a small amount of water may be needed to keep it moist but not wet)

1. Roll a piece of clay into a ball. The size is up to you but approximately the size of a plum is good.
2. Have the kids push one thumb into the middle of the clay ball.
3. Use the thumb and the index finger to pinch the clay ball into a pot shape.
4. Make sure that the bottom of the pot is at least 1/4 inch in thickness.
5. Gently flatten the bottom of the pot so that it will sit flat.
6. If the clay begins to crack, smooth over cracks with damp fingers.
7. Gently flatten the bottom so the bowl will sit flat.

Happy Crafting!

Saturday, April 10, 2010

How to make Coffee Ground Fossils to Celebrate Earth Day


This year is the 40th anniversary of Earth Day.

Earth Day is a day designed to raise awareness and appreciation for the Earth and the environment. Earth day is celebrated each April 22nd.


A fun, interesting and educational Earth Day activity is making Coffee Ground Fossils.
Recycling the grounds, and learning about fossils is what makes this activity ideal for the day. Fossils for Kids.com is a good place to search for information on fossils of all kinds.

To make Coffee Ground Fossils you'll need:

* 1 cup of used coffee grounds
* 1/2 cup of cold coffee
* 1 cup of flour
* 1/2 cup of salt
* Wax paper
* Mixing bowl
* Some small objects to make impressions in the dough (using the footprints of toy animals is fun)
* an empty can, round cookie cutter or a plastic knife

directions:

1. Mix together the coffee grounds, cold coffee, flour, and salt in a bowl until well mixed.

2. Take the mixture out of the bowl and place on the waxed paper.

3. Knead the dough and then flatten it out, still on the waxed paper.

4. Use the can/cookie cutter to cut out circles of the dough or use the plastic knife to cut slabs large enough to fit your "fossil" objects.

5. Press your objects firmly into the dough. When you take the object out, you'll have a "fossil".

6. Let the fossil dry overnight. It may take longer to dry depending on the thickness.

7. After the kids have finished their fossils, you can hide then and have a Fossil Hunt.

Friday, March 12, 2010

Old Bell Cow (March is Sing with Your Child Month)


I love this show! Too bad I can only find it on the web.
Here's a clip from the PBS show Lomax the Hound of Music.


Lomax The Hound of Music

Tuesday, March 2, 2010

How to make three very simple Bird Feeders


Kids love to study animals.
A simple way to encourage your children in observing and helping wildlife is to make bird feeders for the yard.

There are three types of bird feeders that can be made using two basic ingredients...peanut butter and bird seed.

Pine Cone Bird Feeder
you'll need : a pine cone, string, peanut butter and bird seed

* Tie a piece of string, approximately 20inches long, firmly onto one end of the pine cone
* Spread a thick coat of peanut butter on the cone
* Roll the coated pine cone in bird seed
* Hang the pine cone in the yard

Bagel Bird Feeder
you'll need: half a bagel (it can be stale), string, peanut butter and bird seed

1. Take a piece of string approximately 20inches long and place it through the hole in the bagel and tie both ends together to make a large loop to hang up your bird feeder with.
2. Spread the flat side of the bagel with a heavy coating of peanut butter.
3. Pour a good amount of bird seed onto a plate
4. Press the peanut butter side of the bagel into the bird seed
5. Hanger you Bagel bird feeder outside

Toilet Paper Roll Bird Feeder
you'll need: a toilet paper roll, string, peanut butter and bird seed

* Poke holes in the top of a toilet paper roll and thread string through them
* Spread a thick coat of peanut butter on the outside of the toilet paper roll
* Pour bird seed onto a plate
* Roll the peanut butter covered toilet paper roll in the bird seed, make sure it is covered well
* Hang your bird feeder outside

Now that you have your bird feeders, the kids can watch the different birds that come to eat, take pictures of the different birds that show up and maybe even keep track of the number of birds and do some research in to the types of birds that appear.

Happy Crafting!!

Wednesday, December 30, 2009

How to Make Your Own New Year's Celebration


Even though the New Year is just a few days away, you still have time to decorate your home and make the new year fun and festive for children and adults alike.

Here's a chance for you to recycle some of those holiday decorations.
Try a few of these ideas:

1. Have ribbons left over from wrapping? Or maybe you just like to save the pretty ones from your gifts. These ribbons can be strung around the room instead of using traditional streamers.

2. You can make paper chains or use the ones from the Christmas tree to hang around the room.

3. Wanna give your new year a big bang? Make Confetti Balloons.
Fill balloons, a quarter full, with confetti (pulling the balloon over a funnel is the simplest method). Then inflate the balloons with a hand pump. At midnight pop the balloons, a sharp pencil will work, and have your own new year's fireworks!

4. Make your own Confetti.
Using paper from your craft stash (pieces of construction paper left over from art projects, used wrapping paper, etc. ) , cut the paper into tiny pieces or you can use paper punches if you have them.

5. Every new year's party needs noise makers.
Toilet Paper Roll Kazoos are perfect for the new year.
Decorate a Toilet Paper roll with markers, paint or glue on paper from your craft stash. Cut a circle of wax paper at least an inch around bigger than the tube. Use a rubber band to attach the wax paper circle to one end of the tube. Now hum or sing a tune!

These are just a few of the fun thrifty and crafty activities you can use to make your New Year special.

Happy Crafting!

How to make paper chains

Friday, October 16, 2009

I Had A Little Overcoat...a Yiddish folksong and recycling activity


This Yiddish folksong is the original source for the Thrifty Tailor story in the previous blog (at my StorytellingCraftsAndKids.blogspot) .
I HAD A LITTLE OVERCOAT
(traditional Yiddish, English by Teddi Schwartz & Arthur Kevess)
(The midi for this song can be found at Mudcat MIDIs )


1.I had a little overcoat, as old as can be
Tralala lalalala lalala
What I'd ever do with it, I just couldn't see
Tralala lalalala lalala
So I thought a little while
And made myself a jacket in the very latest style
Tralalala lalala (2x)
Made a jacket in the very latest style

2. I had a little jacket, it was old as can be
Tralala lalalala lalala
What I'd ever do with it, I just couldn't see
Tralala lalalala lalala
So I thought a little while
And made myself a vest in the very latest style
Tralalala lalala (2x)
Made a vest in the very latest style

3. I had a little vest, as old as it could be
Tralala lalalala lalala
What I'd ever do with it, I just couldn't see
Tralala lalalala lalala
So I thought a little while
And I made myself a tie in the very lastest style
Tralalala lalala (2x)
Made a tie in the very latest style

4. tie / button

5. button / nothing

6. I had a little nothing, as old as it could be
Tralala lalalala lalala
What I'd ever do with it, I just couldn't see
Tralala lalalala lalala
So I thought a little while
And I made myself a song in the very lastest style
Tralalala lalala (2x)
Made a song in the very latest style

1. Hob ikh mir a mantl fun fartsaytikn shtof / Tralala...
Hot dos nit in zikh kayn gantsenem shtokh / Tralala...
Darum, hob ikh zikh batrakht
Un fun dem mantl a rekl gemakht
Tralala... / Fun dem mantl a rekl gemakht

2. Hob ikh mir a rekl... fun dem rekl a vestl gemakht
3. vestl / shnipsl
4. shnipsl / knepl
5. knepl / gornitl
6. gornit / dos lidele

(trad Yiddish, Eng words Teddi Schwartz & Arthur Kevess)

Mudcat MIDIs


Let's talk about Paper!
I love making paper with kids. They have a great time and you never know what you'll get. Making paper is great for using up the scraps of construction paper, wrapping paper or any kind of paper that is used in the class or at home.
I have included three different vids on papermaking....
.
The first is a teacher doing a papermaking demo in class.

The second vid is a very good low tech papermaking vid with kids.

The third vid is a very nicely done slide show about papermaking.

After the vids, I have included a link to papermaking directions.


A great site for directions is Learn2 Make Paper ... this site has good pics also.